

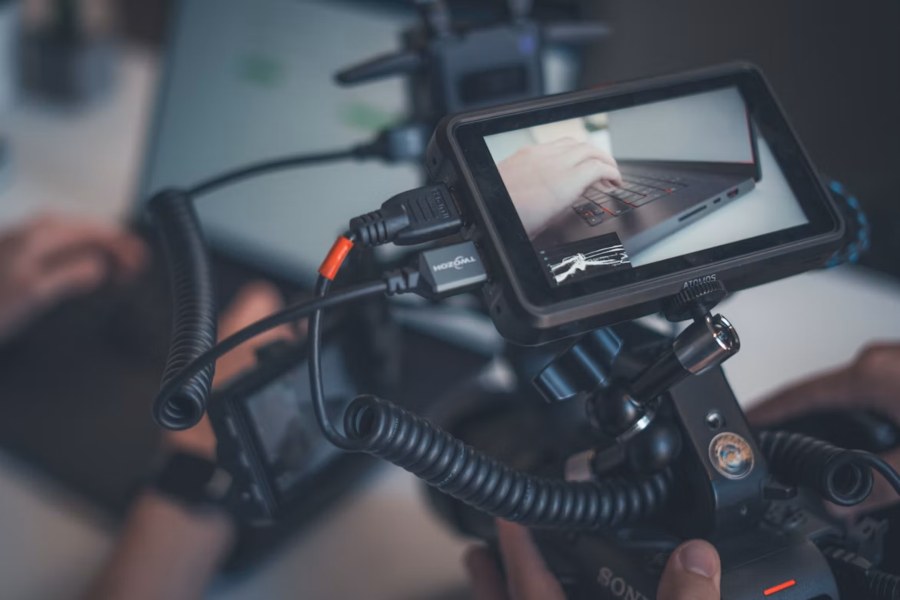
Video is one of the easiest ways to capture information, but it is not always the easiest format to search, quote, reuse, or share. A meeting recording may contain useful decisions, but finding one comment later can take too long. A product demo may explain a process clearly, but a new employee may need written steps. A creator may film useful footage, but still need captions, notes, blog copy, or a script outline.
That is where transcription becomes useful. When you turn video recordings into clear text, you make the content easier to search, edit, repurpose, and understand. The text can become meeting notes, training guides, subtitles, social media captions, blog drafts, customer research summaries, internal documentation, or searchable archives.
The process does not need to be complicated. You capture the video, extract or upload the audio, transcribe it with a reliable tool, then clean the transcript so it reads clearly. The most important part is not only getting words on a page. It is turning messy spoken language into text that people can actually use.
Start With a Clear Recording Purpose
Before recording anything, think about what you want the text to become afterward. A recording meant for meeting notes may need speaker names, decisions, and action items. A training video may need step-by-step instructions. A customer interview may need quotes, themes, and timestamps. A content creator may need captions, ideas, and reusable phrases.
This matters because the purpose affects how you record. If you need an accurate transcript, the audio must be clear. If you need searchable notes, the recording should stay focused. If you need a training document, the demonstration should follow a logical order.
Many people treat transcription as something that happens after the video. Technically, that is true. But the quality of the transcript depends heavily on what happens before and during recording. A noisy, unclear, unfocused recording will usually create more cleanup work later.
Try to start each recording with a short spoken label. Say the date, topic, project name, and speakers if relevant. This simple habit makes it easier to organize the transcript later, especially if you record often.
Capture Better Footage Before You Transcribe
Good text begins with good audio. Even if the video looks beautiful, the transcript will suffer if the sound is unclear. Before recording, reduce background noise as much as possible. Turn off loud fans, move away from traffic, close unnecessary tabs that may send notifications, and ask speakers to stay close to the microphone.
If you are recording a meeting, encourage one person to speak at a time. Transcription tools can struggle when several people talk over each other. If you are recording a demonstration, explain each step out loud as you do it. Do not assume the viewer or transcription tool can understand silent actions.
For practical videos, smart glasses can also play a role. A pair of recording glasses may be useful when someone needs to capture first person footage while showing a product setup, filming a workspace walkthrough, gathering field notes, or documenting a task that requires both hands. This can give the transcript more useful context because the spoken explanation is tied to what the person is actually seeing and doing.
Still, record with care. Make sure you have permission to film people, private spaces, sensitive screens, or customer information. A transcript can make private details even easier to find later, so it is better to avoid capturing anything that should not be stored.
Choose the Right Transcription Tool
Once you have the recording, use a separate transcription tool to turn the spoken audio into text. Many tools can do this now, including built-in video platforms, meeting apps, dedicated transcription services, and speech recognition APIs.
For simple needs, a meeting tool or creator platform may be enough. For larger workflows, teams may prefer a dedicated transcription tool that supports speaker labels, timestamps, exports, and folder organization. Developers or larger companies may use an API, especially if transcription needs to be built into an app or internal system.
Google Cloud’s Speech-to-Text documentation explains that its service can take audio and return a text transcription, with guides for short audio, long audio, and streaming input. You can review the official Cloud Speech-to-Text documentation if you need a more technical option.
The best tool depends on your purpose. If you are transcribing interviews, speaker identification may matter. If you are creating captions, timecodes matter. If you are documenting internal training, easy export to documents may matter more than advanced settings.
Do not choose a tool only because it looks popular. Choose one that fits your privacy needs, file types, languages, accuracy expectations, and budget.
Prepare the File for Transcription
Before uploading or processing the recording, check the file. Make sure the video plays correctly and the audio is present. If the file is very long, consider whether you need the whole thing transcribed or only a useful section.
Some tools allow direct video uploads. Others may work better if you extract the audio first. Audio files are often smaller and easier to process than video files. Common formats include MP3, WAV, M4A, and MP4, depending on the tool.
If you recorded multiple clips, name them clearly before transcription. A file called “client-demo-product-setup-sept-15” is much easier to manage than “IMG_4839.” If you have several speakers, write down their names before you begin so you can correct labels later.
It is also wise to keep a copy of the original recording. The transcript may need checking, and you may want to return to the video for tone, visuals, or exact context.
Review the Raw Transcript First
The first transcript will rarely be perfect. Even strong tools can make mistakes with names, accents, technical terms, background noise, fast speech, and overlapping voices. Treat the raw transcript as a draft, not a final document.
Start by reading through it once without editing too much. Look for major issues. Are sections missing? Are speakers mixed up? Did the tool misunderstand key terms? Are timestamps present if you need them? Is the transcript divided into useful sections or one long block?
Then listen to the most important parts of the recording while checking the text. You do not always need to review every second, but you should verify quotes, numbers, names, instructions, deadlines, and anything that may be used publicly or for decision making.
For customer interviews, legal discussions, medical content, financial content, or internal policy training, accuracy matters more. In those cases, spend extra time checking the transcript before sharing it.
Clean Up Spoken Language
People do not speak the way they write. Raw transcripts usually include filler words, repeated phrases, half-finished sentences, false starts, and unclear references like “this thing” or “over there.” That is normal. Cleaning the transcript makes it easier to read and search.
Start by removing unnecessary filler words when they do not affect meaning. Words like “um,” “you know,” “like,” and repeated starts can make the text harder to follow. Keep them only if tone matters, such as in a direct quote where you want to preserve how someone spoke.
Next, fix punctuation and paragraph breaks. Long blocks of text are hard to scan. Break the transcript into short sections by topic. Add headings where useful. If the speaker moves from background to instructions to next steps, separate those parts.
You can also clarify references. If someone says, “put it there,” and the video shows a label being placed on a box, the cleaned text can say, “place the label on the top right corner of the box.” This turns the transcript into usable documentation instead of only a record of speech.
Add Structure for Searchability
A searchable transcript needs more than accurate words. It needs structure. Add a clear title, date, topic, speaker names, and short summary at the top. If the recording is long, add headings for each major section.
For meetings, include decisions, action items, deadlines, and owner names. For training videos, include materials needed, steps, warnings, common mistakes, and a quick recap. For interviews, include themes, key quotes, timestamps, and follow-up questions.
Use keywords naturally. If the transcript is about a product demo, include the product name, feature names, customer problem, and use case. If it is about a venue tour, include room names, layout notes, vendor areas, and decor details. Searchability improves when the text uses the words people are likely to search later.
Do not overdo it. The goal is not to stuff the transcript with keywords. The goal is to make the information easy to find.
Turn the Transcript Into Different Content Types
Once the transcript is clean, it can become much more than a text version of the video. It can support several types of content and documentation.
A recorded webinar can become a blog post, FAQ page, quote bank, LinkedIn post, newsletter, and short video captions. A product walkthrough can become a help article, onboarding guide, support script, or internal training checklist. A customer interview can become research notes, testimonials, messaging ideas, or sales enablement material.
The transcript helps because it gives you the raw language. You can see how people explain things, what words they repeat, and which questions come up naturally. This is especially useful for marketing, training, sales, and customer support teams.
For creators, transcripts also make repurposing easier. A video can become subtitles, a caption, a blog outline, a script for another video, or a list of short clips to edit. Instead of rewatching the full recording again and again, the creator can scan the text and find the strongest parts faster.
Use Timestamps When They Add Value
Timestamps are useful when people may need to jump back into the original video. They are especially helpful for interviews, training videos, product demos, legal recordings, lectures, and long meetings.
You do not need a timestamp on every sentence. That can make the transcript feel cluttered. Instead, add timestamps at section breaks or next to important moments. For example, note where a product demo begins, where a speaker answers a key question, or where a trainer shows an important safety step.
Timestamps also help editors. If a transcript includes a strong quote or useful clip, the editor can return to the right moment quickly. This saves time and reduces the chance of missing valuable footage.
If you plan to create captions or subtitles, keep the timecoded version separate from the cleaned reading version. Captions need timing. A readable document needs flow.
Protect Privacy and Sensitive Information
Turning video into text can make sensitive information more visible. A private comment that was hidden inside a one hour recording may become easy to search once transcribed. That is useful for work, but it also creates risk.
Before sharing a transcript, remove private details that do not need to be included. This may include phone numbers, addresses, passwords, customer names, medical details, financial information, employee issues, or confidential business plans.
If the transcript is from a workplace recording, follow company rules about consent, storage, and access. If it includes customers or clients, be especially careful. Text files can be copied, forwarded, searched, and stored more easily than video files.
It is also smart to label transcripts clearly. Mark whether they are internal, public, client approved, draft, or final. This helps prevent accidental sharing.
Create a Simple File Naming System
Searchability depends on good file names as much as good transcript text. A messy folder full of files called “final,” “new transcript,” and “video notes” will become frustrating quickly.
Use a consistent format. Include the date, topic, and project name. For example: “2026-09-15-product-demo-onboarding-transcript” or “2026-09-15-client-interview-pricing-feedback.” This makes files easier to sort and search.
Store the transcript near the original video if possible. If the video is in a folder, keep the transcript, summary, captions, and edited assets in the same project folder. This keeps the workflow clean.
For teams, decide where final transcripts belong. They may go into a shared drive, knowledge base, learning system, CRM, project management tool, or content archive. The location should match how people will use the information later.
Use AI Carefully for Summaries and Cleanup
AI tools can help clean transcripts, create summaries, pull action items, and turn long recordings into shorter formats. They can save a lot of time, especially when the raw transcript is long.
But AI cleanup should be reviewed. A summary can miss nuance. A cleaned transcript can change meaning. A tool may remove words that matter or make a speaker sound more certain than they were. Always check important details against the original transcript or recording.
A good workflow is to use AI for first-pass cleanup, then review manually. Ask it to remove filler words, add headings, summarize themes, or create a checklist. Then check the output for accuracy, tone, and missing context.
For public content, keep the human voice. A transcript from a real video often has useful personality and natural phrasing. Do not polish it so much that it becomes generic.
Make the Text Easy to Use
The final transcript should match the way people will use it. A transcript for search may be detailed. A transcript for a blog post may need rewriting. A transcript for training may need clear steps and warnings. A transcript for captions may need short lines and timing.
Do not treat every transcript the same. Before finalizing, ask what the reader needs. Do they need exact words, clean notes, a summary, instructions, quotes, or action items?
Then format the text accordingly. Use short paragraphs, clear headings, and simple labels. Add links to the original video when needed. Include timestamps for key moments. Remove clutter that makes the text harder to read.
The goal is not to create a perfect record of every sound. The goal is to create text that helps people find and use the information.
Final Thoughts
Video recordings are full of useful information, but that information can stay trapped if nobody wants to rewatch the full file. Transcription makes the content easier to search, share, edit, and reuse.
The best workflow starts before transcription. Record clearly, label files, capture useful context, and avoid private information that should not be stored. Then use a separate transcription tool, review the raw text, clean up spoken language, add structure, and save the finished version where people can find it.
When done well, a transcript becomes more than a record. It becomes a working document. It can support training, marketing, research, customer support, content creation, and internal knowledge sharing. A good video may capture the moment, but clear searchable text helps that moment keep working long after the recording ends.